in the toolbar to open the Cable Designer in a new window.
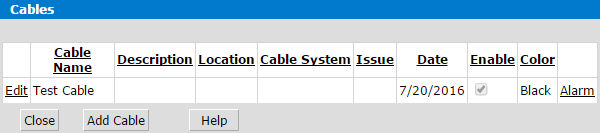
1. Click the Cables button in the toolbar to open the Cable Designer in a new window.
2. Click the Add Cable button to create a new cable. Click the Edit button to modify existing cable data.
3. Enter/edit the cable data in the Cable window.
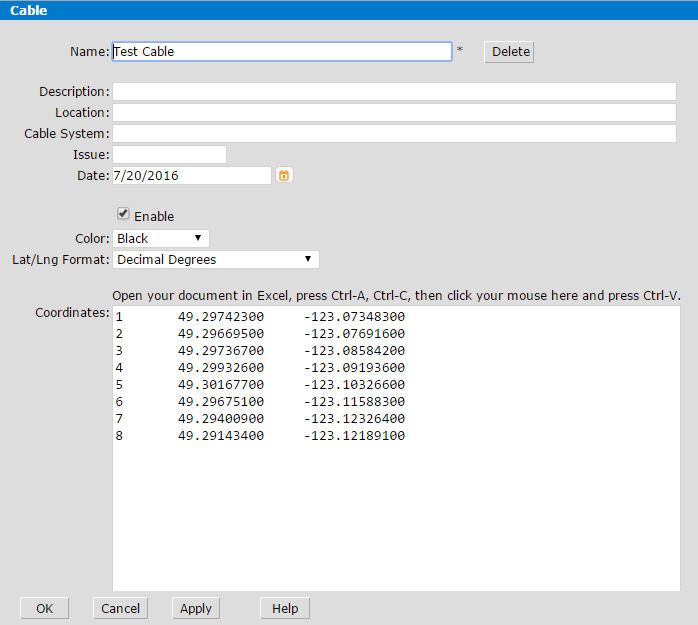
4. Click OK to return to the previous window. Click the Alarm link for your selected cable to open the Cable Alarm form.
5. Specify the size of the security zone in the Radius field and select its color from the Color drop-down list.
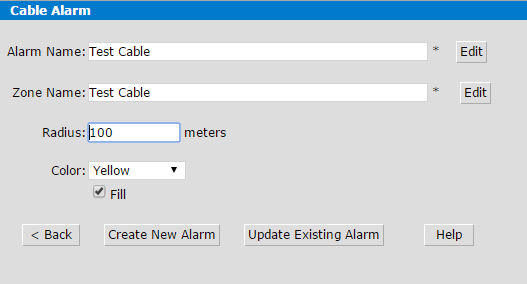
6. Click the Create New Alarm button to create the cable alarm. If you are editing an existing cable alarm, click the Update Existing Alarm button instead.
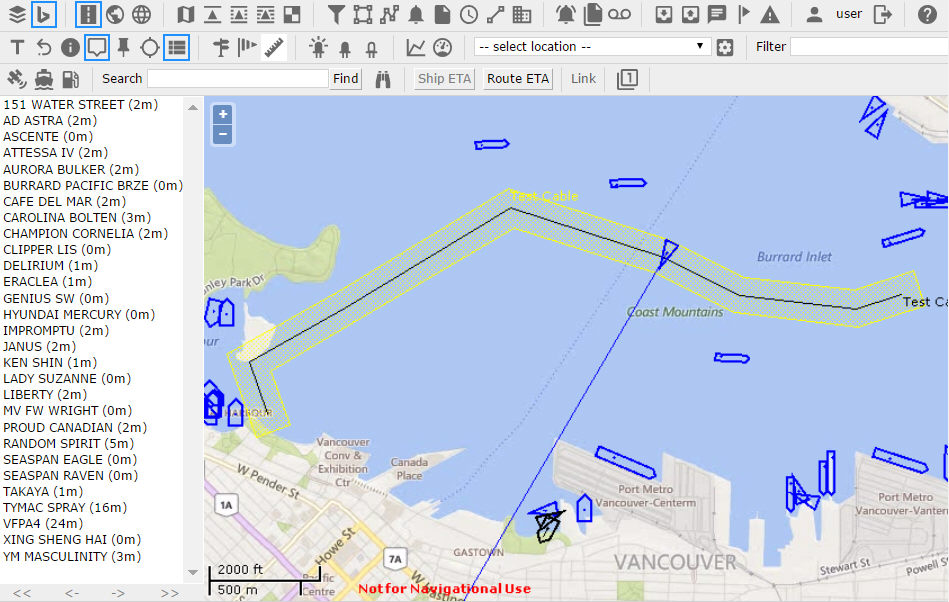
After creating the cable:

After creating the alarm zone:
7. Click the Alarms button  to open the Alarm
Designer.
to open the Alarm
Designer.
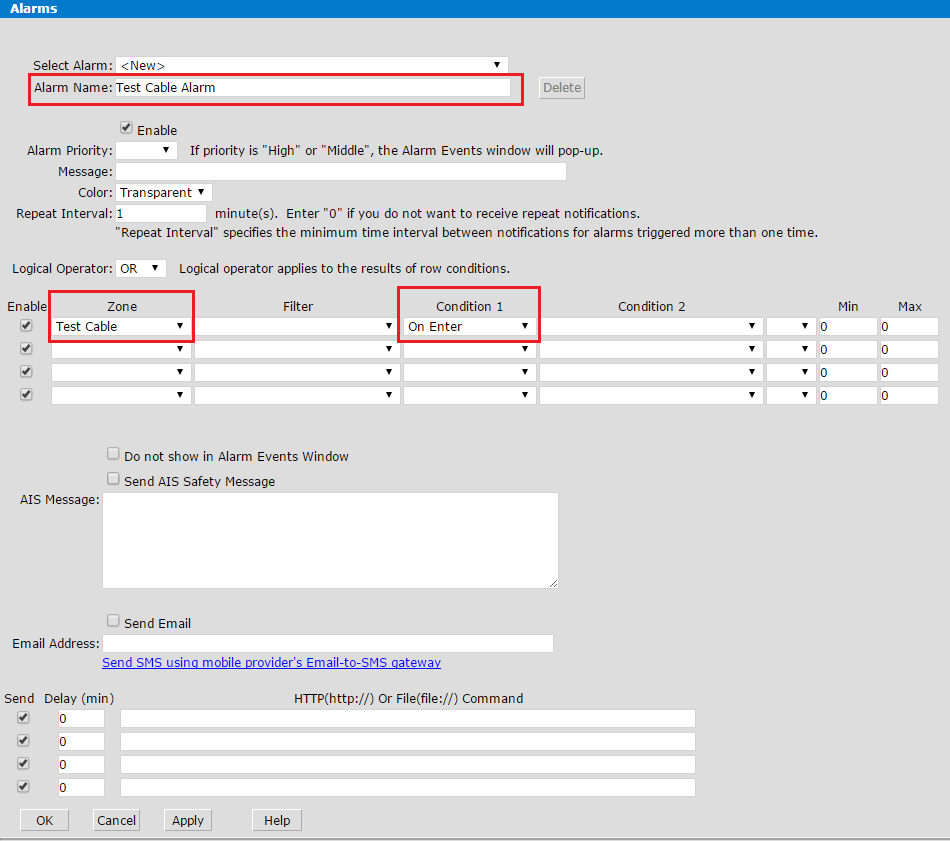
8. Enter new alarm name in the Alarm Name field.
9. Select an existing zone for your cable alarm zone from the Zone drop-down list.
10. Select an alarm condition from the Condition 1 drop-down list (e.g. On Enter, In Zone, etc.)
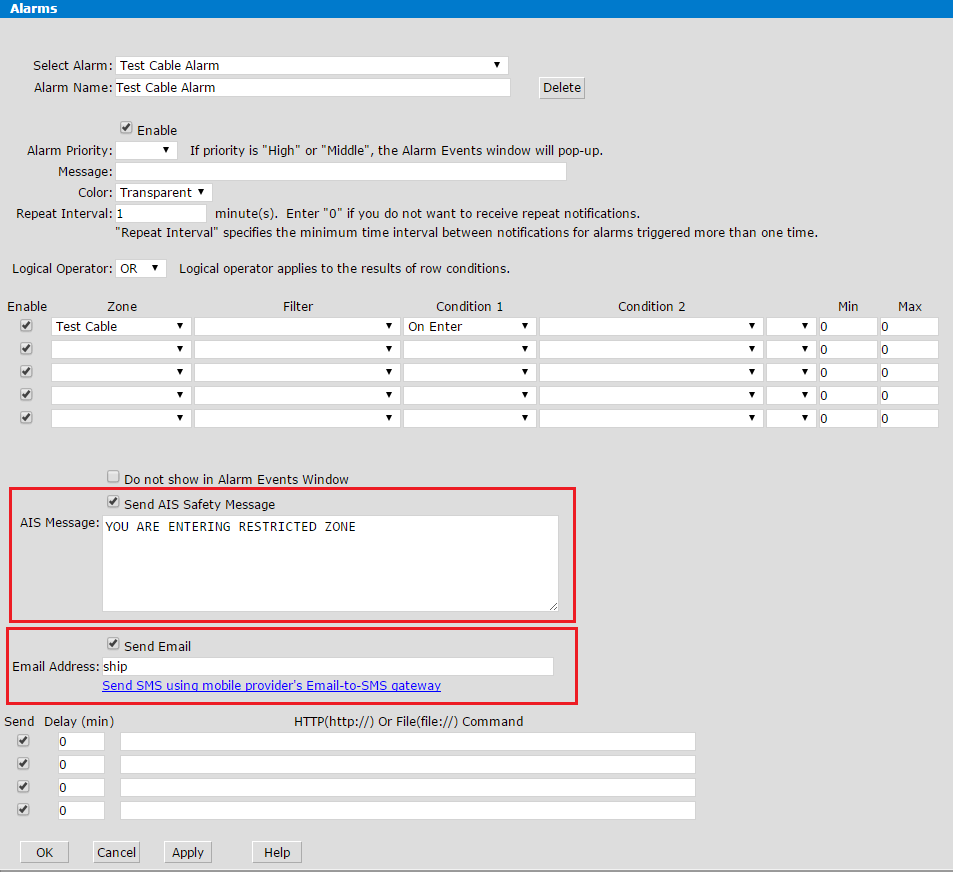
11. (Optional) To send an AIS safety message to the ship triggering your alarm, check the Send AIS Safety Message box and type your message into the AIS Message field.
12. (Optional) To send a copy of the AIS message via email, check the Send Email box and type the recipient's address into the Email Address field. Note: If you type 'ship' into the Email Address field, the system will automatically retrieve the ship's email address from Lloyd's Register of Ships.
13. Click OK to save your alarm.
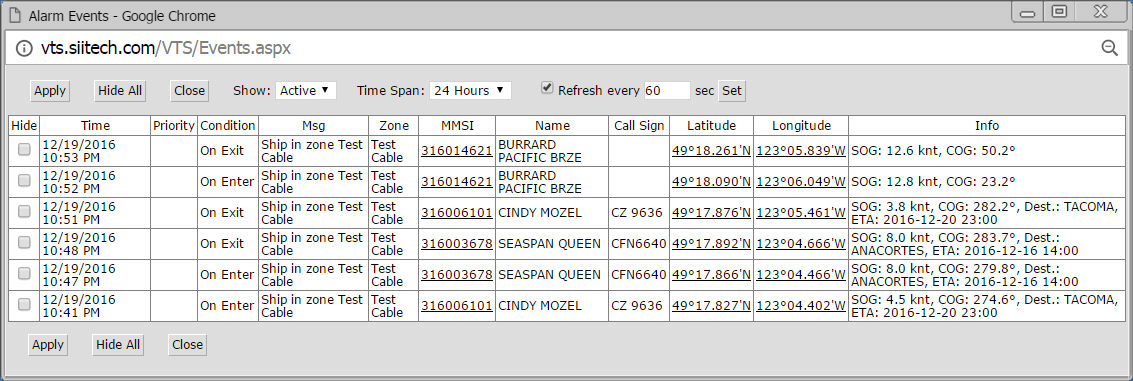
Alarm Events window showing alarms triggered as a result of setting up this cable: