
As soon as you start Web VTS, you’ll see its toolbar at the top of the application window. The toolbar contains tools to access commands and perform other actions. You click a tool to perform its action. Some tools complete the action immediately; others place you in a mode to complete the action.
Map/Chart tools in the toolbar:

 -
Display Microsoft Virtual Earth Maps.
-
Display Microsoft Virtual Earth Maps.
 -
Display Google Maps.
-
Display Google Maps.
 - Display OpenStreetMaps.
 - Display ArcGIS Online Maps.
 -
Display Electronic Navigational Charts (S-57).
-
Display Electronic Navigational Charts (S-57).
 - Display Raster Navigational Charts (BSB).
 - Display
Raster Navigational Charts On Top.
- Display
Raster Navigational Charts On Top.
 - Display Electronic Navigational Charts (Water
Only).
- Display Electronic Navigational Charts (Water
Only).
 - Display locations of available navigational charts.
Designers and other tools in the toolbar:

 -
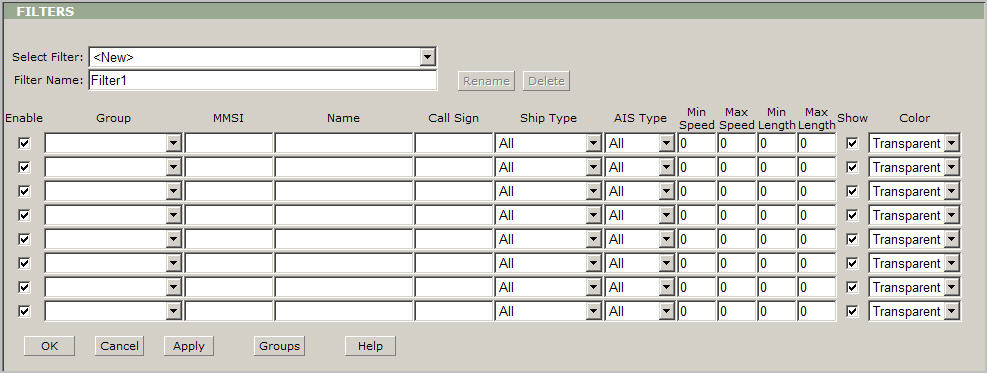
Open Filter Designer.
-
Open Filter Designer.
 -
Open Zone Designer.
-
Open Zone Designer.
 -
Open Route Planner.
-
Open Route Planner.
 -
Open Alarm Designer.
-
Open Alarm Designer.
 -
Open Report Designer.
-
Open Report Designer.
 - Open
the Ship Data window.
- Open
the Ship Data window.
 -
Show the Alarm window.
-
Show the Alarm window.
 - Open Report Center.
 -
Show the History Replay panel.
-
Show the History Replay panel.
 -
Open Messages Inbox.
-
Open Messages Inbox.
 -
Open Messages Outbox.
-
Open Messages Outbox.
 -
Open the Sent Messages window.
-
Open the Sent Messages window.
 -
Open the Virtual Buoy Sender window.
-
Open the Virtual Buoy Sender window.
 - Show the Emergency and Incident Command Support
panel.
- Show the Emergency and Incident Command Support
panel.
Show names, show tracks, display vessels' list, show ship information, display information balloons, follow selected ship, show only selected ship, select location, filtering, and action tools in the toolbar:

 -
Click the Show Names button to display on a chat/map
the names of vessels.
-
Click the Show Names button to display on a chat/map
the names of vessels.
 - Click the Show Tracks button to display
vessels' track.
- Click the Show Tracks button to display
vessels' track.
 - Click the Show Ship Names List to
display the Ship Names List.
- Click the Show Ship Names List to
display the Ship Names List.
 - Click
the Show Ship Information
button to display the Vessel Info panel.
- Click
the Show Ship Information
button to display the Vessel Info panel.
 - Click the Show Information Balloon
button to display information balloons.
- Click the Show Information Balloon
button to display information balloons.
 - Click
the Follow Selected Ship
button to keep the vessel on the middle of the chart.
- Click
the Follow Selected Ship
button to keep the vessel on the middle of the chart.
 - Click
the Show Only Selected Ship
button to eliminate all other ships from the chart.
- Click
the Show Only Selected Ship
button to eliminate all other ships from the chart.
 -
Use this box to set up a desired location, so next time you could
move to it by the only one click.
-
Use this box to set up a desired location, so next time you could
move to it by the only one click.
 -
Click this button
-
Click this button  to
edit the active filter or click this arrow
to
edit the active filter or click this arrow  to
select a filter.
to
select a filter.
 -
Type the name of the vessel or
MMSI number or Call Sign in the Search
box and click Go to find the vessel.
-
Type the name of the vessel or
MMSI number or Call Sign in the Search
box and click Go to find the vessel.
- Type the name of the vessel
or MMSI number or Call Sign in the Search box and click
History to find the last know position of the vessel.
 -
Click the Show ETA button to monitor Distance and Estimated Time of
Arrival to the established waypoints.
-
Click the Show ETA button to monitor Distance and Estimated Time of
Arrival to the established waypoints.
 - Use a mouse right click to make Copy Shortcut
to provide others with the same screen settings.
- Use a mouse right click to make Copy Shortcut
to provide others with the same screen settings.
Administrative
tools (only visible for the Web VTS administrator):

 - Click the Options button
to apply Web VTS settings.
- Click the Options button
to apply Web VTS settings.
 - Click the Users button to
manage users' accounts.
- Click the Users button to
manage users' accounts.
 - Click the Show Offline Stations
button to display
offline ais stations.
- Click the Show Offline Stations
button to display
offline ais stations.
 - Click the Show All Stations button to display all ais stations.
 - Click the Show Station Status button to display the report.
 - Use
the AIS Feed filter
to filter ais feeds.
- Use
the AIS Feed filter
to filter ais feeds.
General tools:
 -
Click this button when you finish your work with the application.
-
Click this button when you finish your work with the application.
 -
Click this button to open the Web VTS User’s Guide.
-
Click this button to open the Web VTS User’s Guide.